
Packing a Road Trip Emergency Kit That Actually Works
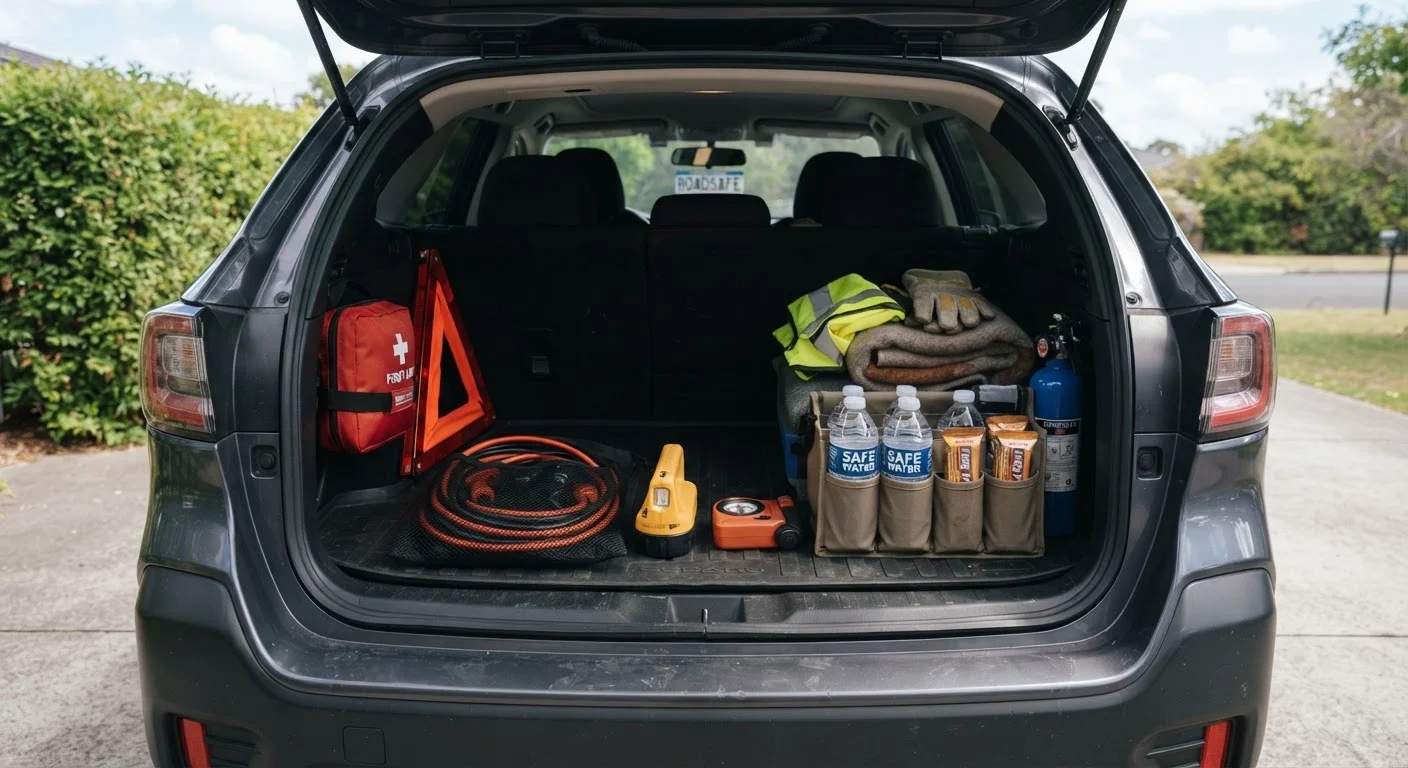
Photo credit: SnippetColumns.com | Easy Search, Reliable Information
In this article
Learn what belongs in a reliable roadside emergency kit, how to organize it, and which items are most commonly overlooked by everyday drivers.
Key Takeaways
- A functional emergency kit covers four categories: safety, mechanical, medical, and communication.
- Many pre-packaged kits leave out critical items like a physical map, work gloves, and a portable phone charger.
- Store your kit where you can reach it quickly — not buried under luggage.
- Review and restock your kit at least once a year and before any long drive.
- An emergency kit complements — but does not replace — roadside assistance coverage or a pre-trip vehicle inspection.
Why Most Drivers Are Under-Prepared
The average driver spends somewhere between 30 minutes and a full day waiting for roadside assistance after a breakdown, depending on location and time of day. That window is far more manageable — and far safer — when you have the right equipment on hand. Yet most vehicles either carry nothing, or carry a bare-minimum kit that was purchased once and never reviewed again.
Pre-packaged kits sold at discount retailers often skip the items that matter most under real conditions: quality jumper cables, reliable lighting, a waterproof container, and any form of communication backup. The goal of a working emergency kit isn't to replace a mechanic — it's to keep you safe and functional while you wait for one. For a broader look at trip preparation, see the complete road trip planning framework that covers everything from route selection to what to do when things go sideways.
What you will need
Jumper cables or jump starter pack
Restarts a vehicle with a dead battery without needing another car nearby.
Reflective warning triangles or LED road flares
Alerts oncoming traffic that your vehicle is stopped, reducing collision risk.
Compact first aid kit
Addresses minor injuries like cuts, burns, and blisters until professional help is available.
Flashlight with extra batteries (or hand-crank)
Provides reliable light for roadside work or signaling at night.
Tire inflator and sealant or portable compressor
Temporarily restores pressure in a punctured tire to reach a service station.
Waterproof work gloves
Protects hands when handling dirty or sharp components like a spare tire or battery terminals.
Portable phone charger (power bank)
Keeps your phone functional for navigation and emergency calls when your car's power is unavailable.
Physical road atlas or printed route map
Provides navigation backup if your phone loses signal or battery in a remote area.
Step-by-Step: Building Your Kit
Never Change a Tire in a Live Lane
If your vehicle becomes disabled on a highway, move as far off the road as possible before attempting any repairs. Turn on hazard lights immediately, set out reflective triangles or flares at least 100 feet behind the vehicle, and stay behind the guardrail if one is present. When in doubt, stay in the car with seatbelts fastened and call for help. Roadside emergencies cause serious injuries every year simply because drivers stood in traffic.
Audit what you already have
Before buying anything, check your vehicle for items that may already be on board: a spare tire, lug wrench, and jack are standard in most vehicles. Locate them and confirm they are in working order — a flat spare or a corroded jack does you no good at mile marker 200. Note any gaps so your shopping list is targeted, not redundant.
Assemble your safety signaling items
Start with the items that protect you from oncoming traffic before any repair happens. Pack at least three reflective warning triangles or LED road flares. These are non-negotiable on highways and rural roads where drivers may crest a hill with little warning. Visibility gear is the single most important category in the kit.
Add mechanical and tire recovery tools
Beyond the vehicle's factory jack and wrench, include a portable tire inflator or a can of tire sealant for slow leaks that don't require a full swap. A compact multi-tool or adjustable wrench handles minor mechanical tasks. Jumper cables (at least 12 feet, 6-gauge) or a self-contained lithium jump starter pack are essential — the jump starter removes the need to flag down another driver.
Build a practical first aid section
A pre-packaged first aid kit is a reasonable starting point, but customize it for your group. Add any personal medications, antihistamines for allergic reactions, blister treatment if you'll be hiking, and any pediatric supplies if traveling with children. Include a basic first aid reference card if anyone in the vehicle isn't confident with wound care. This section handles minor injuries only — serious medical emergencies always require professional care.
Pack communication and navigation backups
Dead phones are among the most common and preventable roadside problems. Pack a fully charged power bank rated at least 10,000 mAh and a car charger cable as backup. Add a printed map or road atlas covering your route — cell coverage fails in mountain passes, rural stretches, and national park corridors where help is also furthest away. A whistle and a small notepad with emergency contact numbers written down (not just stored in your phone) round out this section.
Include comfort and survival basics
Extended waits — especially in extreme heat or cold — require more than tools. Pack at least two liters of water per person, a foil emergency blanket (compact and effective), energy bars or non-perishable snacks, and a small roll of duct tape. In winter climates, add an ice scraper, a small shovel, and a bag of sand or kitty litter for traction under tires.
Organize, store, and verify placement
Pack everything into a single, labeled waterproof container. Store it where it's reachable without unpacking all your luggage — behind the driver's seat, under a rear seat, or in a dedicated trunk compartment. Run through the full kit once before departure, then commit to an annual review. Replace anything consumed, expired, or damaged before your next trip.
Use a Single, Dedicated Container
Resist the urge to scatter emergency items across different bags. A single waterproof duffel or hard-sided bin keeps everything findable under stress. Label sections with masking tape — Safety, Medical, Tools — so any passenger can locate the right item fast.
What to Do After You've Built the Kit
A stocked kit is only part of the equation. Before any long drive, confirm that your vehicle itself is roadworthy — a pre-trip vehicle safety inspection can catch tire wear, brake issues, and fluid problems that no kit can fix on the roadside.
It's also worth understanding what your roadside assistance plan actually covers before you need it. Many drivers assume their plan handles towing, fuel delivery, and lockout service — but limits vary significantly. Review what roadside assistance plans cover and what they don't so there are no surprises at the worst possible moment.
If you do end up stopped on the roadside, your kit gives you tools — but knowing the correct procedures matters just as much. The roadside breakdown procedures every driver should know walks through exactly what to do from the moment you feel something go wrong to the moment help arrives.
Check Expiration Dates Before Every Trip
First aid supplies, emergency food rations, and even some adhesive items degrade over time. Jumper cables with cracked insulation and flares past their printed expiration date can fail when you need them most. Build a quick annual review into your routine — ideally at the same time you rotate your tires or change your cabin air filter.

Author
Autos & Driving Editorial Team
Autos & Driving Editorial Team is the collective byline for our editorial team and contributor network. Articles published under this byline or an editorial pen name are researched, written, and reviewed according to our editorial standards for clarity, consistency, and independence before publication.
View all articles →